Thursday, December 10, 2009

Holiday Art Sale


Some of my work can be purchased at the WaterWorks Art Center 2009 Holiday Fina Art Show & Sale at 1710 West Charles Page Blvd., Tulsa. The show runs through December 19. The Art Center is open Monday through Saturday. Hours 9 to 9 Mon-Thurs, 9-5 Fri, 10-6 Sat.

Wednesday, November 11, 2009

That thing I'm working on


"...You're not a Lord of the Rings fan are you?"

Don't judge me!

I'm a little concerned that the star field around the neck is a little "patriotic." It's not supposed to be. Not that I'm not patriotic. That's just not the message here. The message is obviously "this is a pot with the tree of Gondor on it." Just kidding. I have no idea what's going on. The only parts I know I'm keeping are the trees. Still working this one out.

What is it? Uh.. a vase?


I tried making a smooth coil thing to make it less about being a coil pot. You can still see the coils, though. Kind of like ribs. When I started, I thought about applying a texture at the end, but I'm not so sure. If I don't, I have to glaze it, and I'm a little scared of glaze.

More tiles with kids


I had my second group of kids in my art class, so we did clay tiles again.

Here's mine:


Clearly I put a lot of thought into it.

Sunday, October 18, 2009

Pip jug

Just realized I never posted a finished photo of this:

Preview


This is a terrible cell phone picture of something I'm working on. The pot has been built, but I'm still working on the decorative aspects of it. The above image is part of what I've done so far. Here's what the piece looks like:


Front view, and back view from an angle. In these pics the top isn't finished. Coils were just added but not smoothed.

And if it looks like a butt to you, well, I can't really say it isn't a butt. The base shape is based on an old pot I did my first year called "The Butt Pot." Coil building just really lends itself to organic forms!

I have more to say about a change I've made in my work recently, but it's 1 a.m. and I don't think now is the time to get into it. I'm going on vacation for a week, but when I get back, I'll finish this and another coil pot I've got going on, and write a bit about what I'm trying to do now.

LOL!


(click to enlarge!)

Tile has been sent and recieved. Apelad posted some pics on his flickr.

The tile was finished with red iron oxide stain. The specks you see are particles in the clay body. Probably iron or something.

Wednesday, September 30, 2009

Owls

I had some clay that was a bit dried out--not very plastic. Not good enough for most things, but good enough to make a couple little owls:


Four inches tall I think.


Five inches? I am bad at guessing these things. Tall and skinny.

Boston Avenue Holy Wow Creative Arts Class

Because I am "artistic" I was asked to teach a one-hour art class on Wednesday nights for mid- and high schoolers at my church (Boston Avenue United Methodist). Last week, we did clay tiles. I prepared wet 6" by 6" tiles for the kids to carve into or make imprints or whatever they liked.

I picked up a bunch of leaves because I thought it would be fun to make leaf imprints. Here was my example:


I'm going to finish these with red iron oxide stain, so the stain will really highlight the leaf texture.

The kids':


Aren't these cute?

Lamoni, IA rest stop tiles

On the way back to OK from Ottumwa, I stopped at the rest stop/Iowa welcome center near Lamoni and found these cool handmade terra cotta tiles on the building and around the grounds. I wonder who made them.


I really like how they did the lettering.

Indian Hills: Instructors and Students

A few pics from the opening on September 14th.


Piece by Jake Allee and myself.


Juston Rominger and his wall.


Me and some of mine (on top).


Opening night crowd.


Top shelf: works by Kendra Bogert. Bottom: by instructor Lisa Fritz.

Monday, September 14, 2009

Preparing for the show

Friday afternoon, my friend Juston Rominger finished building his installation of, what, we'll say 1,000 cups. Kendra Bogert and I also helped put up labels. Here are a few pictures of the show that opens today:


Juston


A couple of my pieces.


Kendra adjusting her beautiful work.

Ottumwa Courier article: A ceramics showcase

The Ottumwa Courier printed an article today about the show Indian Hills Ceramics: Instructors and Students, which I am in. It's not a particularly good article, and in the photo caption they called Juston Rominger "Jason". But it's nice to have coverage. I hope there's a good turnout at the reception tonight.

Read the article.

The show opens today and runs through November 5th at the Indian Hills Community College Art Gallery in Ottumwa, Iowa. The Art Gallery is at the back of the library and is open during library hours. Opening reception tonight at 7:00 to 8:30 p.m.

Sunday, August 30, 2009

I forgot to mention in the previous post that water in the clay will also make it explode. Same reason--it heats up and wants to escape. Aaaand having an even thickness like I was talking about helps the clay DRY evenly.

I may not be updating on this blog for a few weeks because at about 2:30 this morning I decided I'm going on a little trip! I'll be in Iowa for a few weeks. So actually I may update because part of the reason I'm going to Iowa is to participate in a faculty/alumni ceramics show at Indian Hills Community College in Ottumwa where I went to school.

YEAH!

Saturday, August 29, 2009

Busted!

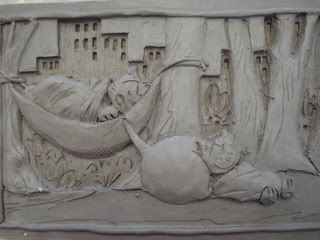
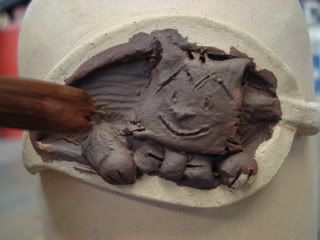
Alright, so I'm not like a top class ceramist or anything. My craftsmanship is sometimes sub-par. (Well, in my opinion. My standards are higher than my abilities.) I don't worry about it all the time. I think I just don't have enough experience yet to have all that neatness business down and I'm more focused on the creative parts of the work. Anyway, I brought that Laugh-Out-Loud Cats tile home with me so I could baby it while it dries. I was looking at it earlier and it occurred to me that parts of it are 3/4" thick. As if I didn't have enough things falling apart around me, I suddenly realized that this piece could blow!

The thickness itself isn't a problem, but when you've got a thick wad of clay, there's more of a risk for air bubbles in the clay. When you fire clay (this one's going up to somewhere around 2000 degrees before it's done), if there's any air inside it, it will expand and it will escape--even if that means blowing up the piece. (This is why in hollow pieces you will always find at least a little pinhole to let the air out.)

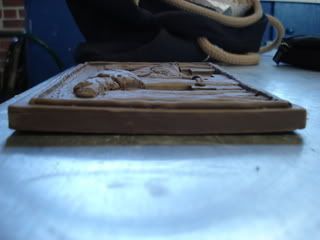
If I had just rolled out this clay to 3/4" inches, it probably would have air bubbles, but this was rolled out to 1/2", most of it cut out, and the thicker parts carefully built up, so it should be alright (I'm telling myself). I mean, I pretty much know what I'm doing. But usually, even when I'm careful like this, I do carve out the thick parts from the back:


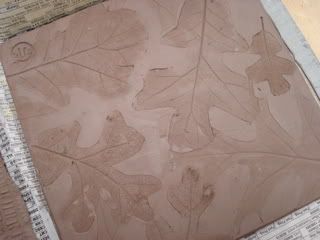
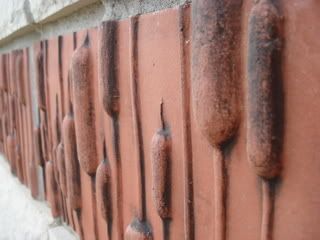
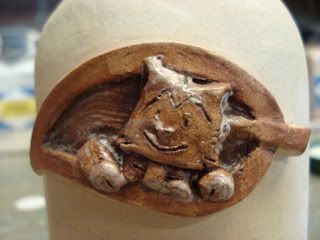
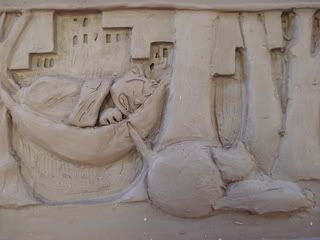
Tile made from slab rolled out to prolly 1/4", built up.


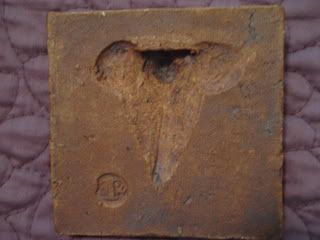
Thick parts carved out. So it's really about the same thickness everywhere, for the most part. This one also is carved in such a way you can hang it from a nail.

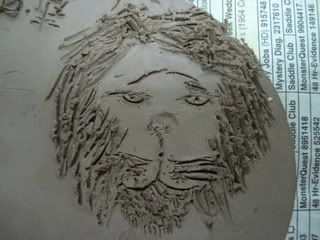
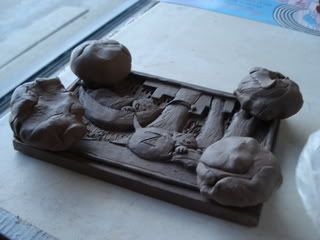
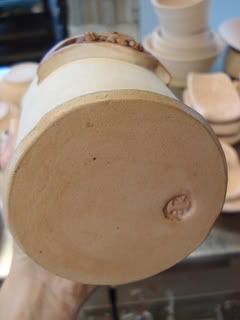
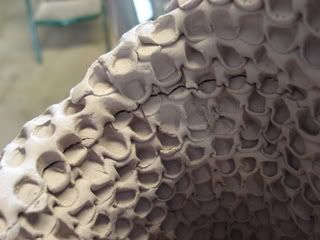
I did not do this with the Laugh-Out-Loud Cats tile because I was so scared to pick it up too much and mess with it. It's the most complicated bit of sculpting I've ever done*. This is the back of the Laugh-Out-Loud Cats tile:


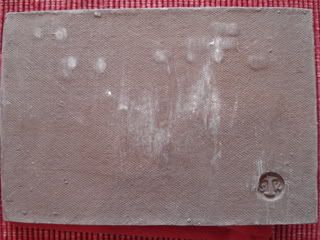
The white stuff is just dust. The bumps are from pressing a tool in to make the impressions of windows in the buildings. The center is kinda rubbed smooth from working it so much on the other side. It's kind of an ugly little thing, ain't it?

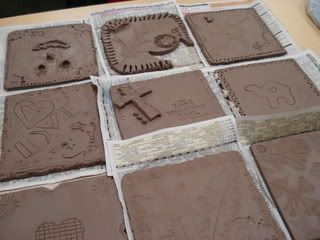
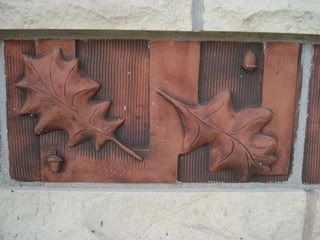
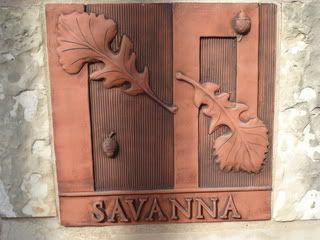
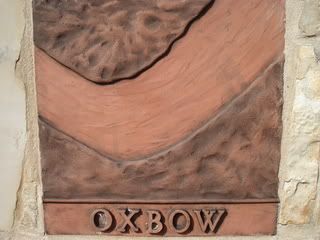
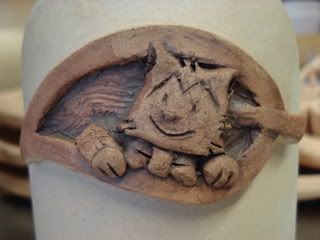
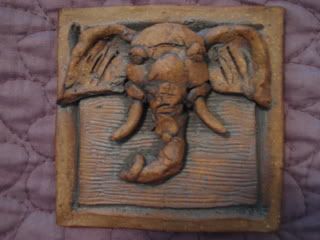
By the way, it will have a finish pretty similar to the elephant tile depicted.

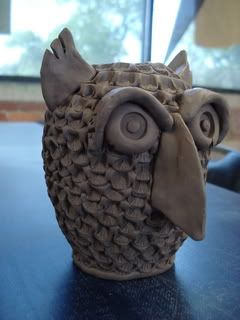
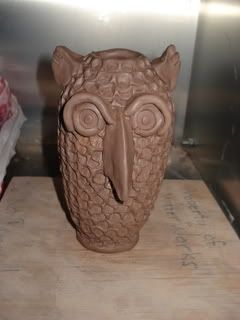
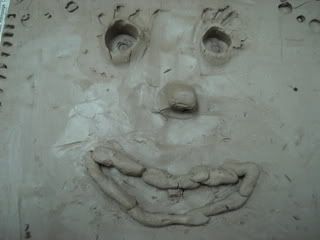
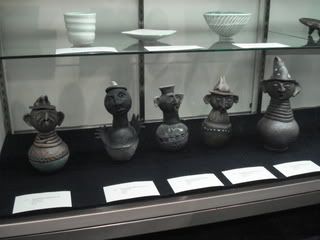
*Besides something like this:

Tuesday, August 25, 2009

Drying tiles

Tiles will want to warp when they dry.


I've got a little curl here, you can see. (In this case I think it's partly because it's been on a slightly warped wooden board.) It's not significant. At this point it's unlikely I can reverse it, but I can try to prevent any further curling.

This happens because the top, which is exposed to air, dries faster than the bottom. And clay shrinks as it dries. At Indian Hills, we'd dry our tiles on an open grid rack (which was actually the grid off one of those square box fans). At WaterWorks, we've got plaster boards, which will suck moisture out.


Here I've got the tile on a plaster board with wads of clay weighing the corners down. I know it looks silly, but I've done it many times before and my tiles are mostly flat with at most a tiny wobble.

I'm a little concerned this one's going to end up a little wobblier than my others.

Glazing Pip, etc.

Dipped bottom in denim blue glaze. (There wasn't enough of the green I wanted, so I opted for the blue I knew would work.) Then sponged off the glaze that pooled on the waxed parts (the bottom and on the Pip deco).


Time to dunk the top in white.


There will be a little overlap. The colors in this case will mix to make a light blue.


The result in profile:


The inspiration for my glazing scheme comes from this wheel-thrown mug by Whitefish Pottery, Whitefish, Montana.

Thursday, August 13, 2009

Laught-Out-Loud Cats #1189


It's done! Pretty much. I starting putting in Apelad's signature, but then realized I couldn't see the end of it on my reference image, so I'll have to add the "RD" later (of A. Koford). And maybe clean up some bits. Pip's face doesn't match the proportions of the original (mine is shorter and wider) but it's CUUUUUTE and that was really the hardest part of the whole thing and I think that's just the way it's going to be!

I am so excited to have done this!

Red iron oxide, glaze


This pot is...kind of hideous. (It's called "Strange Slope".) Red iron oxide (powder mixed in water) is brushed on, then the excess sponged off. There is no glaze on this piece.

I like how it kind of looks like blood in the sink.


Glaze is different than a stain because it has a more complex recipe and a glass-forming agent and so on, while the stain in this case is just one ingredient (iron oxide might be used as a colorant in some glaze recipes).

To glaze this piece, I started by pouring glaze inside (with the help of a funnel). You can see I overfilled it and it spilled on the counter. Glaze is easily wiped off with a wet sponge. You can see there's a chunk in the glaze that I might rub off when it dries (it just dries to a powder) or leave it there because it won't hurt anything. Since I had to get the outside wet because of the spill, I didn't want to glaze the outside yet because I want the clay to be fairly dry. Then it can suck up the water in the glaze, causing it to stick.

I ran out of time but I'll finish it tomorrow. The inside is glossy white and the outside will be a forest or olive green. To glaze the outside, I'll dip the piece rather than pour. Actually I'll dip the bottom portion in green, and the top portion in the white, so it will look similar to the bottle I posted previously.

Wednesday, August 12, 2009

It's getting somewhere!


It's almost done! Pip needs work, but most of the rest of it is in place. Just needs cleaning up and stuff. Wheeeeee!

Waxing Pip

Yesterday I applied red iron oxide to the Pip hobo jug. Today I applied wax:


Painting on wax resist with a brush. CAREFULLY! If you make a mistake, the only way to get it off is to bisque it again (to burn it off).


All done!

Also applied wax to the bottom (the "foot") to make it easier to clean glaze off the bottom. I think it comes off easily enough with a wet sponge anyway, but it's standard practice at Waterworks, and it's kind of fun to paint it on, so I do it anyway.

Tuesday, August 11, 2009

Updates...

Step one of glazing the Pip hobo jug: Apply red iron oxide. Iron oxide (rust) powder mixed with water and brushed on.


Then sponge off the excess. This brings out detail and texture.


(The next steps will be brushing on wax resist over the iron oxide to keep glaze off, then actually applying the glaze.)

Bad news regarding this coil piece. I let it dry too fast. Clay shrinks as it dries and the inside dries slower than the outside, so drying pieces like this must be carefully controlled (only letting it sit out to dry one or two hours at a time, using a blow dryer or propane torch to help the inside dry out a little faster). But I got overconfident and left it uncovered when I shouldn't have. This is what happens:


I can't fix it. I've tried fixing others and it hasn't worked very well, and the attempt would be too obvious anyway. I'll just have to let it be. The crack might get even bigger when fired. I'm going to fire it anyway. I just won't be able to show or sell this one.

Laugh-Out-Loud Cats tile:


I cleaned up the edge on the skyline, started working on the cats. Some parts are not attached and will be replaced later. Some is just sketched in and will be redone later.

I find myself unable to work on this project for more than one hour (or less) at a time. But it's getting done slowly and steadily. I'm just really good at wasting time and working on parts I know I'm going to just redo anyway. I don't really know why I'm stalling. But it won't be much longer now. I'll try to have it done by the end of the week.